Introduction
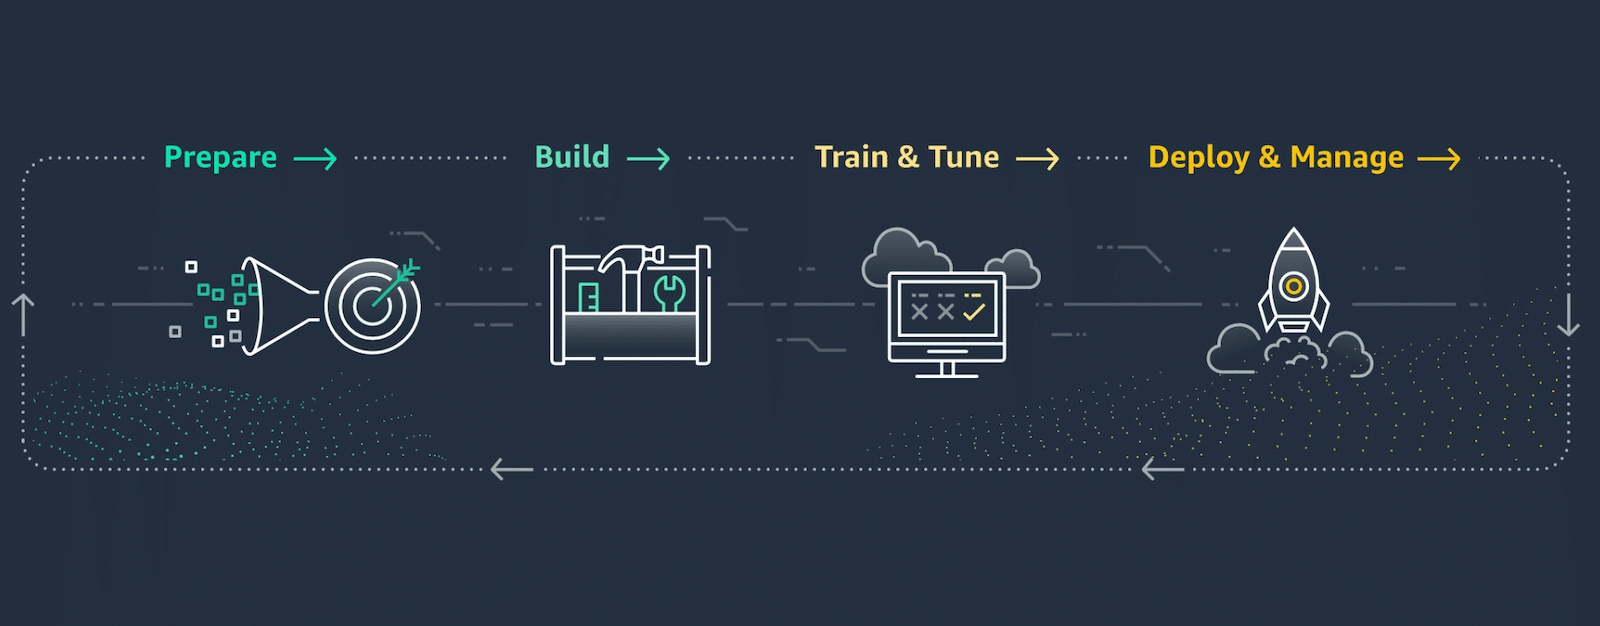
In the previous few articles, we prepared, trained, and employed a model for the VM in AWS EC2. This time we will build our pipeline using AWS instruments like:
- AWS S3, Data Wrangler, Glue, and Athena for data storage, analysis, and pre-processing;
- AWS SageMaker for building the pipeline and analyzing our dataset;
- AWS AutoML for training and deploying our model.
This cool set of features allows us to do much more with less effort. Do you remember the list of things we had to consider before training and deploying our model to VM? Well, now, non of that is necessary. Sounds great, right? There is no need to provision any infrastructure. The platform and tools will do it for us.
If that sounds good to you, let’s get started.
AWS SageMaker
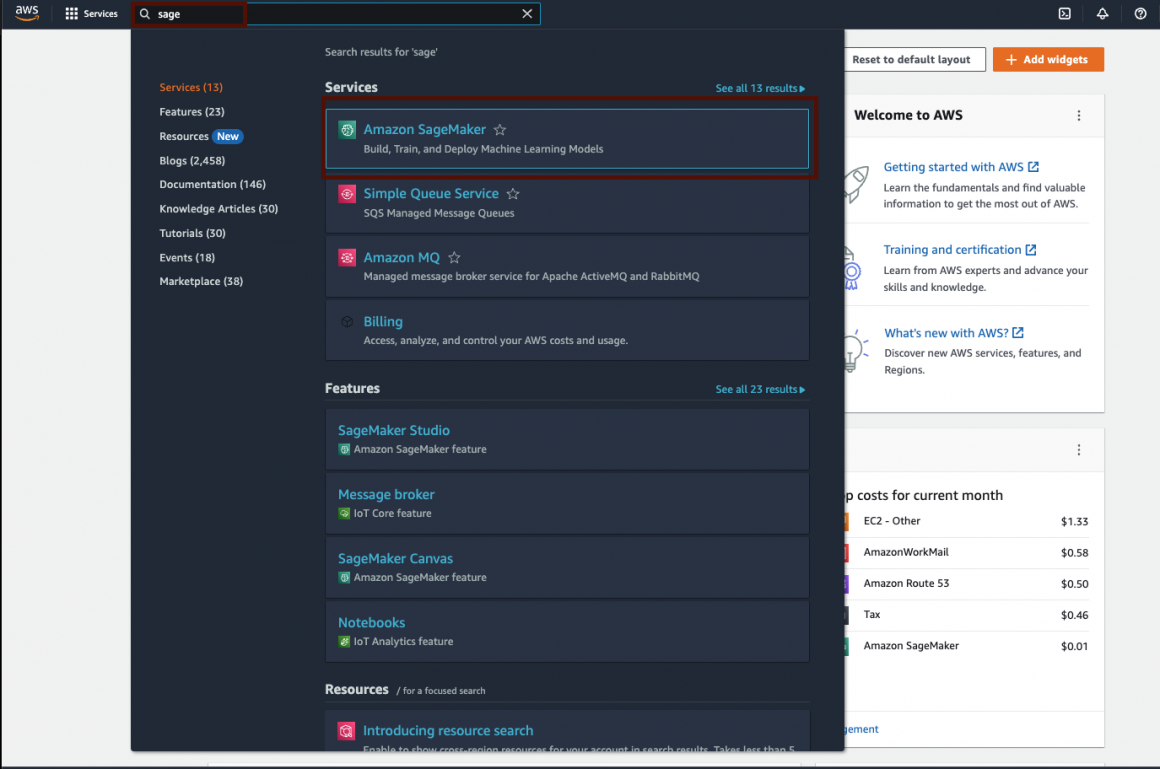
First of all, if you don’t have an AWS cloud console account, please create one. Once it is done, you can open the AWS Console and go to the SageMaker:
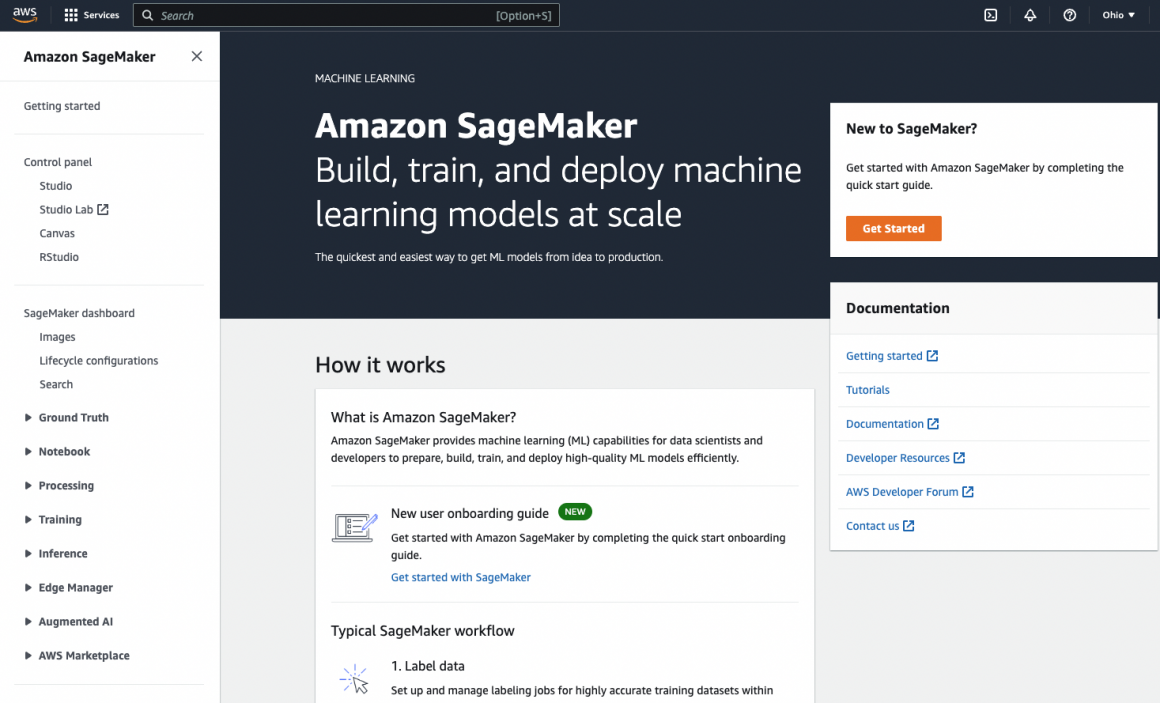
When you first open the SageMaker, it should look pretty empty:
SageMaker Domain
So let’s start creating something here. Under “Control panel,” click the “Studio” link:
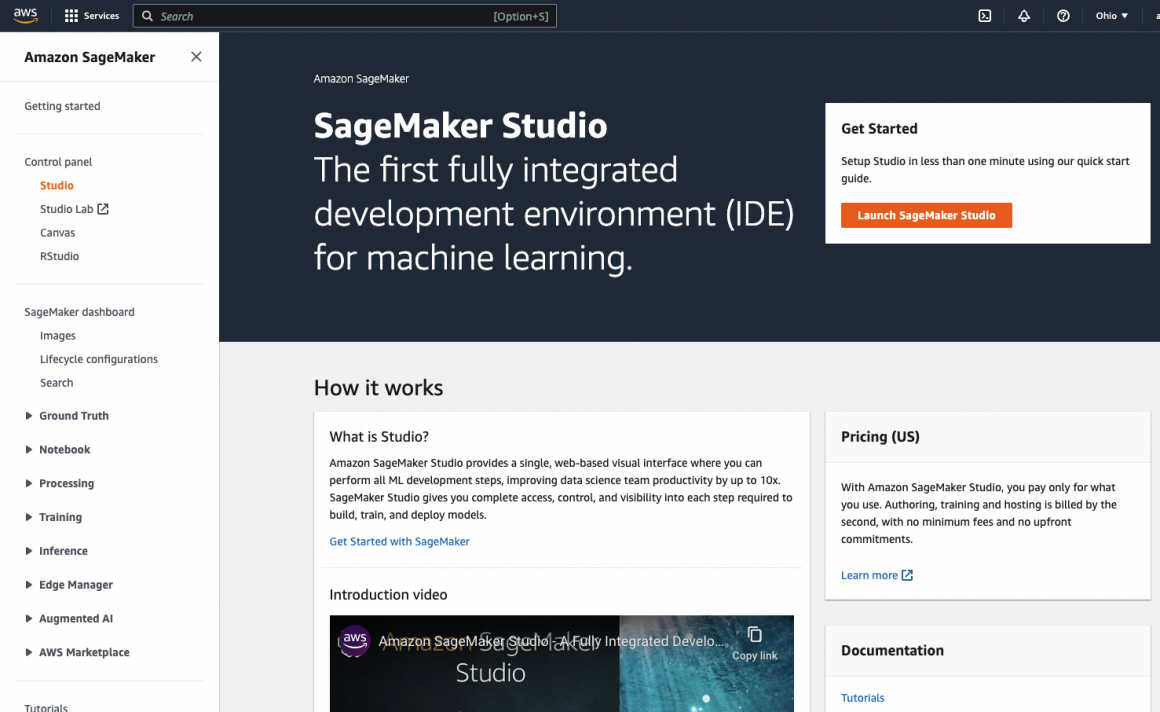
And then the “Launch SageMaker Studio” button on the right side. SageMaker will ask you to create a new Domain, which is basically a project that will store all your resources and apps.
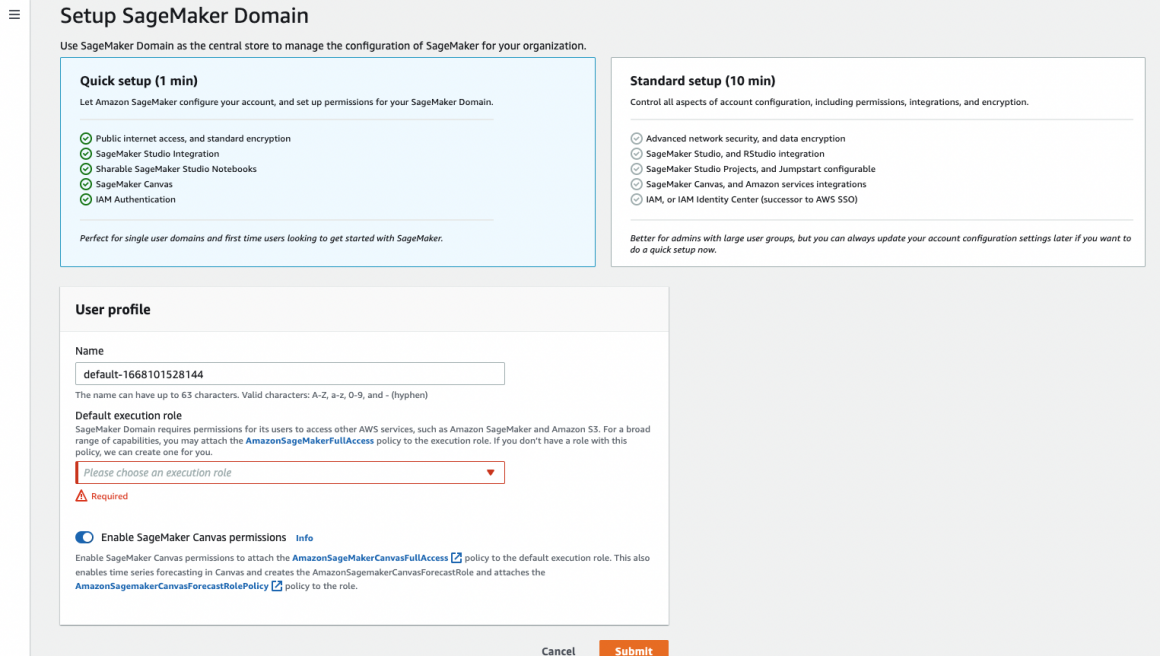
There are two options for you to configure your Domain: Quick and Standard. If you do not have prior experience with SageMaker, I recommend using the Quick setup option. In this setup, you will only provide the name of your Domain and the role SageMaker will assume when executing your scripts. The role is vital because we will be using various services in AWS, and we want to ensure the role will allow us to.
If it is your first time with SageMaker, your only option is to create the role. Which is quite simple actually:
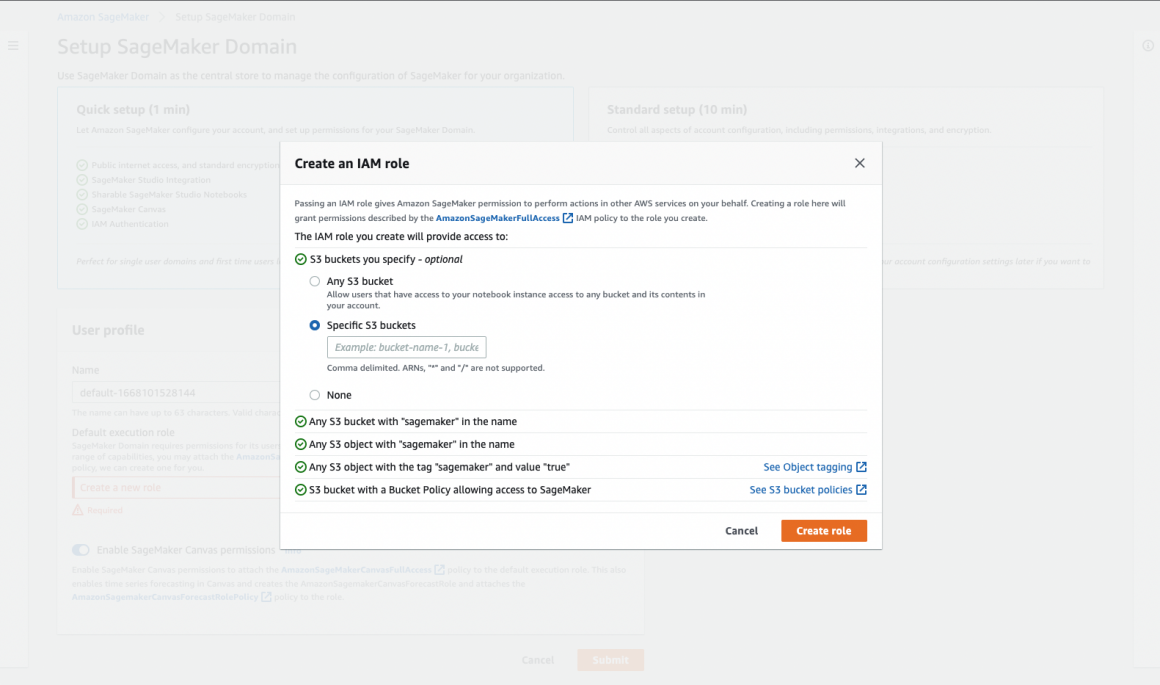
If you want the role to have access to any specific bucket or all your buckets, you can define it. If not, choose None under “S3 buckets you specify” and hit the “Create role” button. This is it, really. Now you can launch your first SageMaker Studio. But you should not do it just yet. There is one more important thing to do.
SageMaker Role
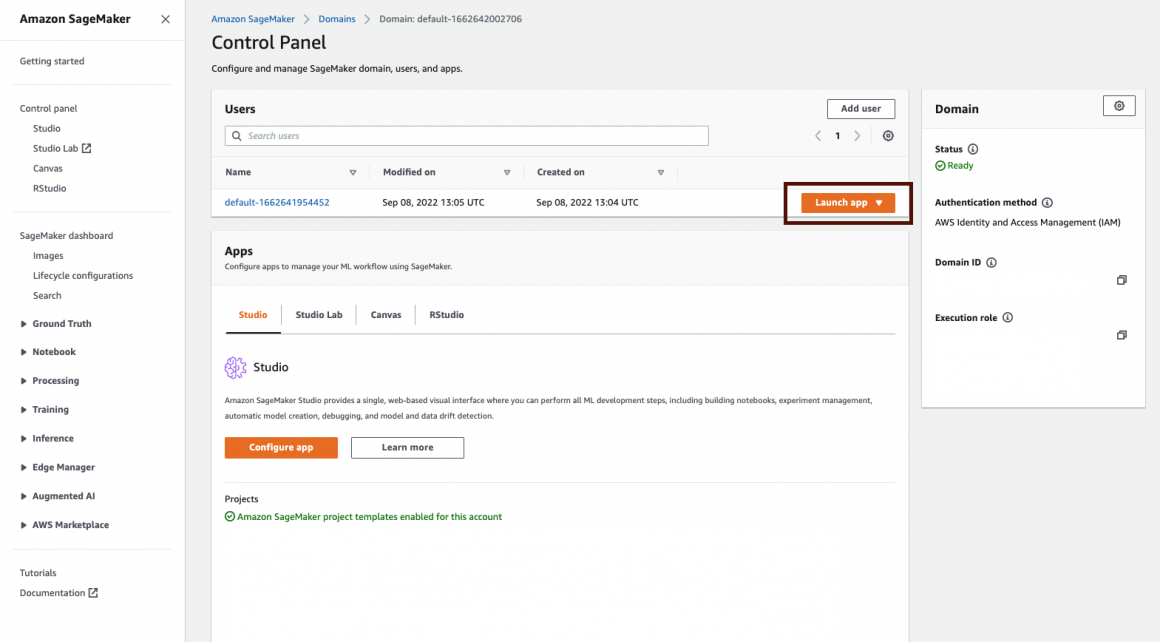
We have to attach relevant policies to the role SageMaker created for us. On the Domains Control Panel on the right side, you see a summary of your Domain. In this summary, you will find the Execution role (at the bottom of the summary). Note the name of this role because now you will attach some policies to it.
It is time to move to the IAM section:
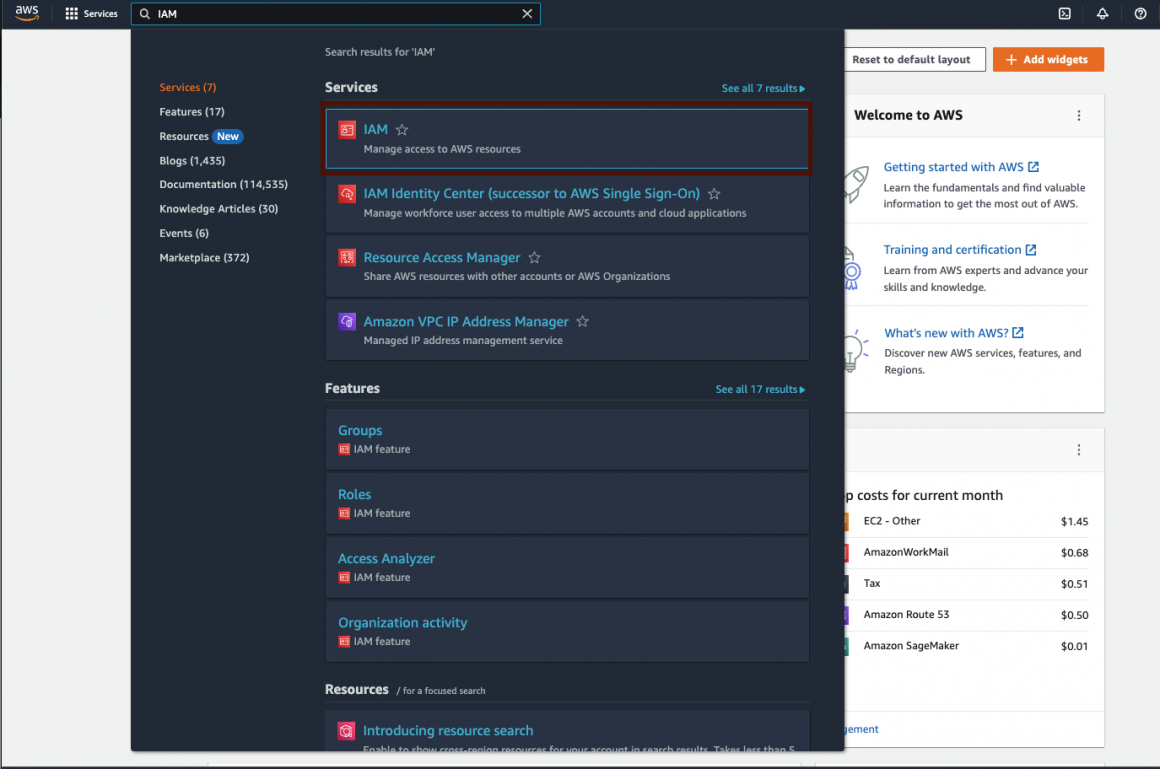
Go to the “Roles” section:
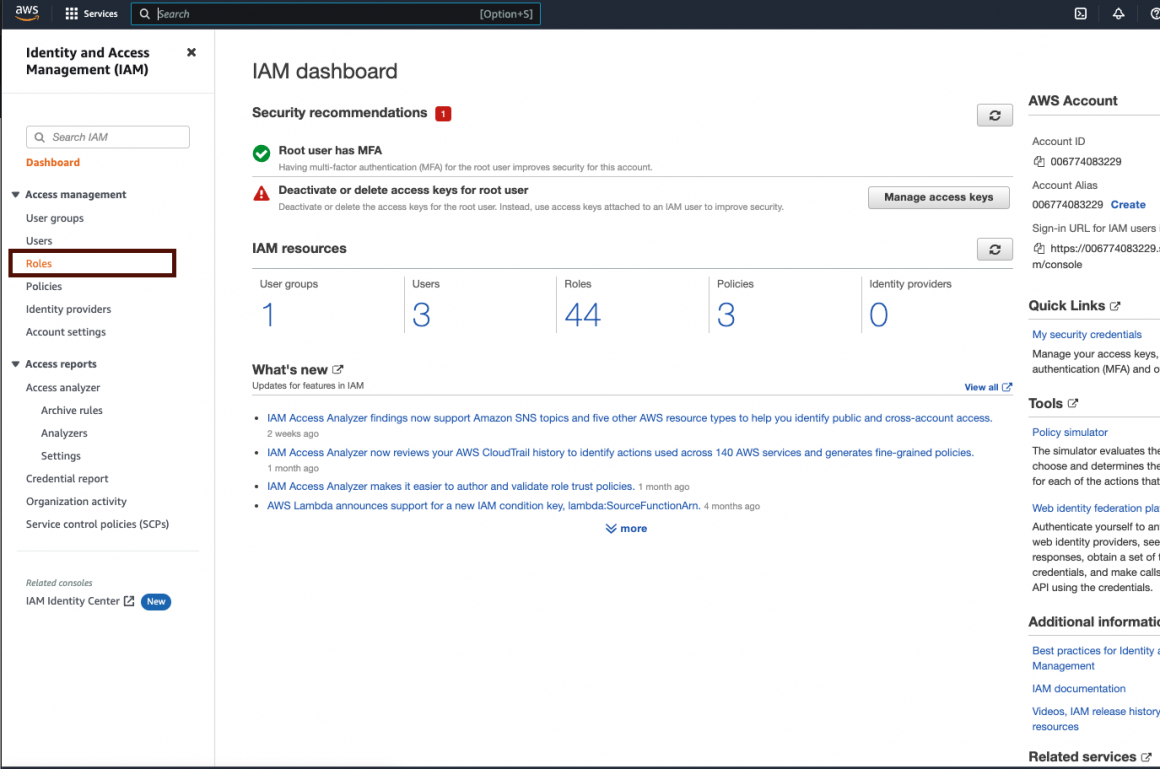
And find the role SageMaker created for us.
Now attach a few more policies, like so:
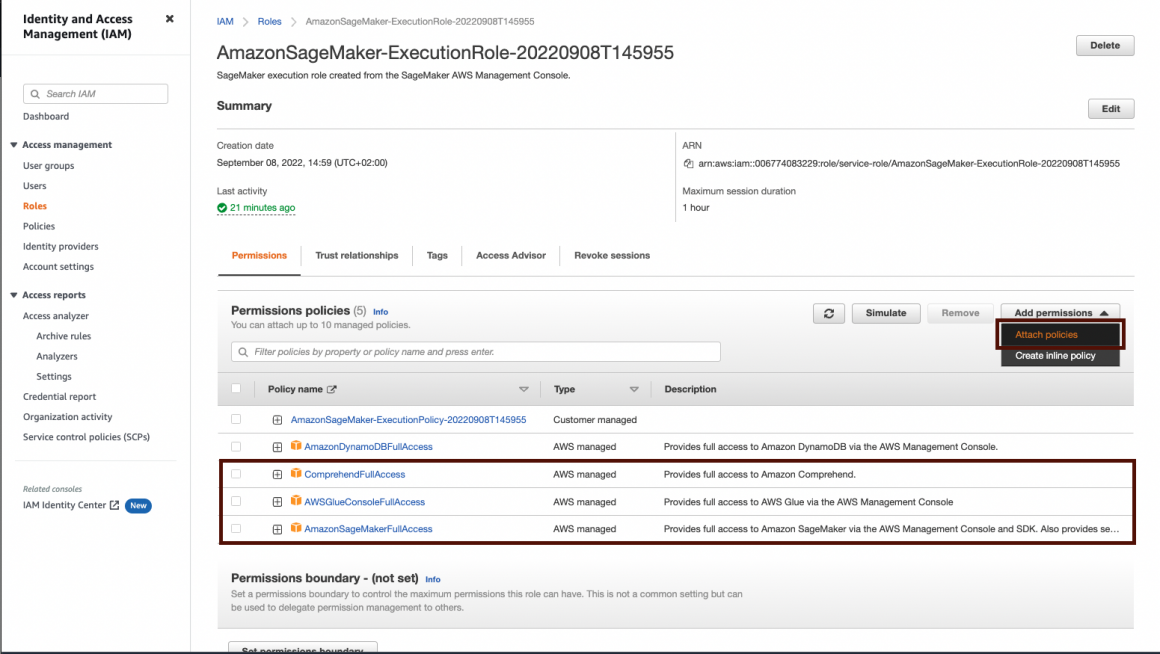
You will find guidance on the screenshot if it’s the first time you do it. First, you click “Add permission”, and in the opened dropdown, you click “Attach policies”.
On the opened window, please find policies “ComprehendFullAccess”, “AWSGlueConsoleFullAccess”, and “AmazonSageMakerFullAccess” and choose to attach them to the role.
SageMaker Studio
Now you can go back to your SageMaker Studio and launch it. In the Studio section, on the right from your new Domain name, you will see the button “Launch app”. Click it, and choose the “Studio” option in the dropdown.
AWS SageMaker will launch your Studio, and it should look similar to this:
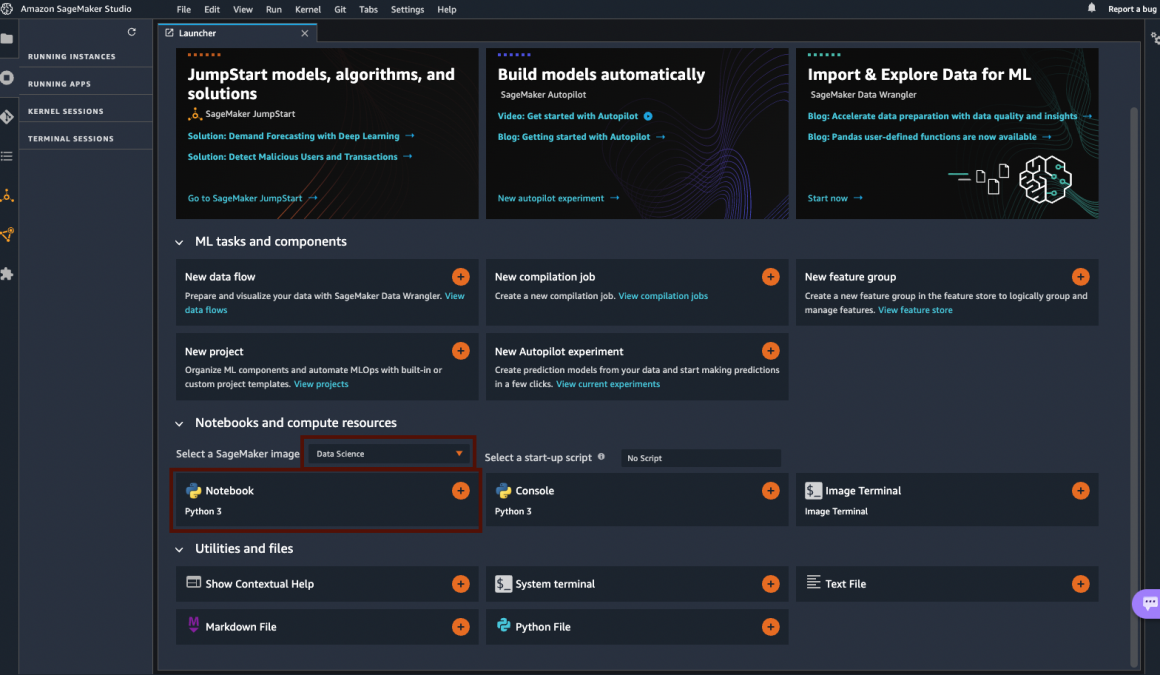
The central part of the window is called the “Launcher page”. Which describes its function: to help you launch whatever you want to launch now. Go to the “Notebooks and compute resources” section and click on the “Notebook Python 3” button. Above this button, you should see that your SageMaker image is DataScience. You can click on the dropdown and check all possible images. For now, it is not necessary, but it’s always nice to know your options.
Resources
In the Notebook top right corner, you can choose the kernel type and instance you’d like to use. Click on the “Python 3 (Data Science)” link:
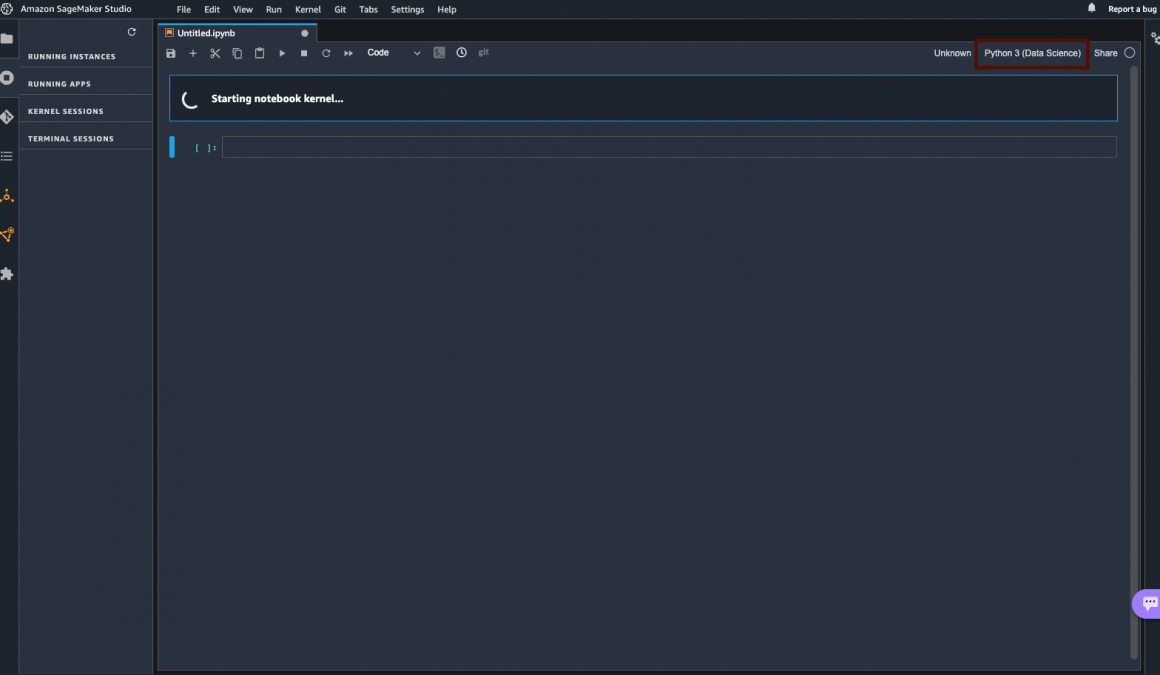
And in the opened window, choose image: “Data Science”, kernel: “Python 3”, instance type: “ml.t3.medium”.
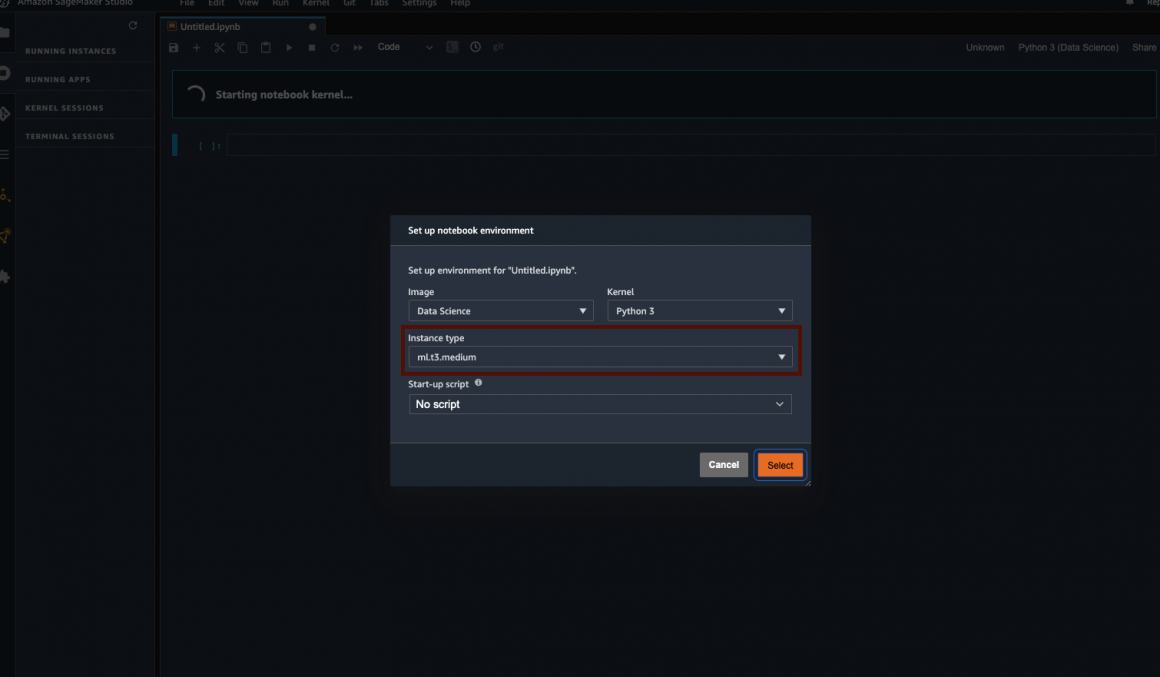
This should cover the processing we will be doing in the following few articles.
In the following article, we will start building our pipeline. But before we go there, there is one crucial thing you should know:
Your Studio and Notebook are using computing resources, which are not free. The cost of what we will be doing should be below $10, but you need to shut down all resources you’ve launched every time you stop working with your notebook. This way, you will pay for the instance only when you use it.
The list of all running resources is available in the “Running terminals and kernels” section.
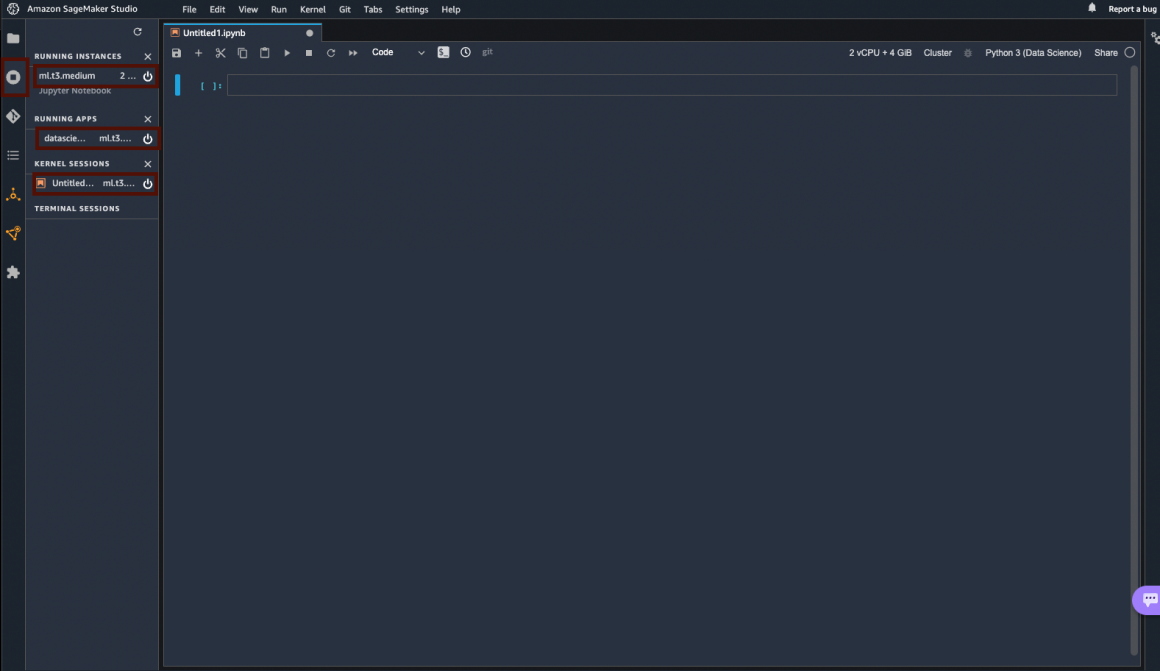
Once you go there, you should see that you have one compute instance, one app, and one kernel session running. On the right side of each, there is a switch-off button. Click on it when you are done working with the notebook. Don’t worry; your notebook will not be lost. It will be saved in the Studio Domain.
Now, when everything is ready, let’s play with Data Wrangler, Athen, and Glue. The following article will teach us how to create the Data Warehouse with just CSV files. And get datasets from it using the reach capabilities of SQL queries.
