Key Takeaways
- Edge Computing is Essential: For autonomous drones, object detection must run on the device itself (the edge) using a board like the NVIDIA Jetson Orin Nano to ensure low latency and network independence.
- YOLOv12 for Performance: The YOLOv12 model offers a state-of-the-art balance of speed and accuracy, making it ideal for real-time inference on resource-constrained edge devices.
- End-to-End Workflow: This guide covers the complete process from training a custom YOLOv12 model in Google Colab to deploying and running it on the Jetson hardware.
- Separate Brains for Robustness: A smart drone architecture separates the high-level AI logic (Jetson Orin Nano) from the low-level flight controls (flight controller) for a more stable and modular system.
Introduction to drone object detection
Welcome to the starting article in a new series dedicated to a very interesting engineering challenge: building an autonomous swarm of drones. Over the course of this series, we will incrementally design, build, and program a fleet of drones capable of intelligent, coordinated, and autonomous operation to fulfill a given mission. We will start with drone object detection and gradually build an autonomous swarm of drones.
Our goal is to create a system where each drone can understand its environment, make intelligent decisions, and collaborate with its peers without direct human intervention. We’ll be diving deep into robotics, embedded systems, and artificial intelligence.
In this first article, we start to lay the foundational stone upon which all higher-level logic will be built: perception. Specifically, we will equip a drone’s brain with the ability to see and understand the world through real-time drone object detection.
We’ll train a state-of-the-art YOLOv12 model and deploy it on our chosen edge computing platform, the NVIDIA Jetson Orin Nano.
The Anatomy of a Smart Autonomous Drone
To understand our approach, it’s crucial to first understand the architecture of our drone’s “brain.” We are conceptually dividing it into two distinct but interconnected parts:
- The Vitality System (Flight Controller): This is the drone’s brainstem. It handles the core functions of flight, such as maintaining stability, managing motor speeds, monitoring battery levels, and executing basic movement commands (e.g., “ascend,” “move forward at 2 m/s”). It’s a low-level, real-time system focused solely on the physics and electronics of maintaining flight and moving as instructed.
- The Logic System (NVIDIA Jetson Orin Nano): This is the drone’s cerebrum, responsible for all higher-level cognitive functions. It processes data from sensors like cameras, makes decisions, and formulates plans. This is where our AI models will run. Its job is not to worry about the specifics of motor PWM values but to decide what the drone should do (e.g., “an object of interest is detected at these coordinates; move to investigate”) and why.
The logic system (Jetson) acts as the manager, sending high-level commands to the vitality system (flight controller), which acts as the worker and executes them. This separation of concerns is a robust design pattern that allows us to focus on complex AI logic without getting bogged down in the minutiae of flight dynamics.
Drone Object Detection on the Edge: Why It Matters
At the heart of our drone’s logic system is its ability to perceive. For many missions, this means identifying objects in its camera feed. This must happen on the device itself—a concept known as edge computing.
Processing data at the edge is non-negotiable for our project for several key reasons:
- Low Latency: A drone can’t afford to send a video feed to a cloud server, wait for processing, and then receive a command back. Decisions must be made in milliseconds to react to a dynamic environment.
- Operational Autonomy: The swarm must be able to function in areas with no internet or unreliable network connectivity.
- Data Privacy and Bandwidth: Transmitting constant high-resolution video streams is bandwidth-intensive and can be a security risk.
This is why we’ve chosen the NVIDIA Jetson Orin Nano. It’s a compact, power-efficient computer designed specifically to run modern AI workloads at the edge. It features a powerful NVIDIA Ampere architecture GPU with CUDA and Tensor Cores, allowing it to perform complex neural network calculations quickly and efficiently—all within a power envelope suitable for a battery-powered drone. This device provides the computational muscle needed for real-time AI inference directly on the drone.
The Eyes of the Drone: What is YOLOv12 and Why is it Cool?
To equip our drone with a sight, we need an object detection model. The “You Only Look Once” (YOLO) family of models is legendary in the computer vision community for its remarkable balance of speed and accuracy, making it ideal for real-time applications. We will be using YOLOv12, a recent and powerful model.
YOLOv12 represents a significant architectural evolution. While previous YOLO versions were heavily based on Convolutional Neural Networks (CNNs), YOLOv12 is an “attention-centric” framework. It successfully integrates attention mechanisms—which have proven superior at modeling global context in an image—while maintaining the high speeds that CNN-based models are known for.
Here’s what makes YOLOv12 particularly cool for our project:
- Area Attention (A²) Mechanism: Traditional attention mechanisms can be computationally expensive. YOLOv12 introduces a novel “Area Attention” module that divides the feature map into smaller segments. This drastically reduces computational complexity while still allowing the model to capture a large receptive field, making it both fast and effective.
- Residual Efficient Layer Aggregation Networks (R-ELAN): This enhanced architecture improves how features are aggregated within the network. It uses residual connections to ensure stable and effective training, especially for deeper, more complex models that use attention.
- Architectural Optimizations: YOLOv12 incorporates several clever design choices for efficiency. It uses FlashAttention to reduce memory overhead, removes positional encoding to create a cleaner and faster model, and adjusts the network’s internal ratios to better balance computation.
- Superior Performance: The result of these innovations is a model that consistently outperforms its predecessors, like YOLOv10 and YOLOv11, in accuracy (measured in mean Average Precision, or mAP) while maintaining competitive, real-time inference speeds. For example, the small YOLOv12-N model achieves a 2.1% higher mAP than YOLOv10-N with a comparable latency.
These features make YOLOv12 an excellent choice for a resource-constrained edge device like the Jetson Orin Nano, where we need maximum accuracy for the lowest possible computational cost.
Part 1: Training YOLOv12 in Google Colab
Before we can use a model on the drone, we need to train it to recognize the objects we care about. For this project, we’ll use a public dataset of military assets. We will perform the training (more accurately, fine-tuning) in a Google Colab environment, which provides free access to powerful GPUs.
Step 1: Install YOLOv12 and Dependencies
First, we clone the YOLOv12 repository and install the necessary Python packages. We use the -e flag to install the package in “editable” mode, which is good practice during development.
!git clone https://github.com/sunsmarterjie/yolov12
!cd yolov12
!pip install -r yolov12/requirements.txt
!pip install -e yolov12/
Step 2: Download the Dataset
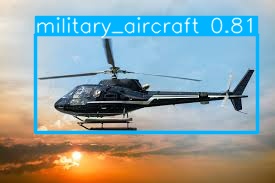
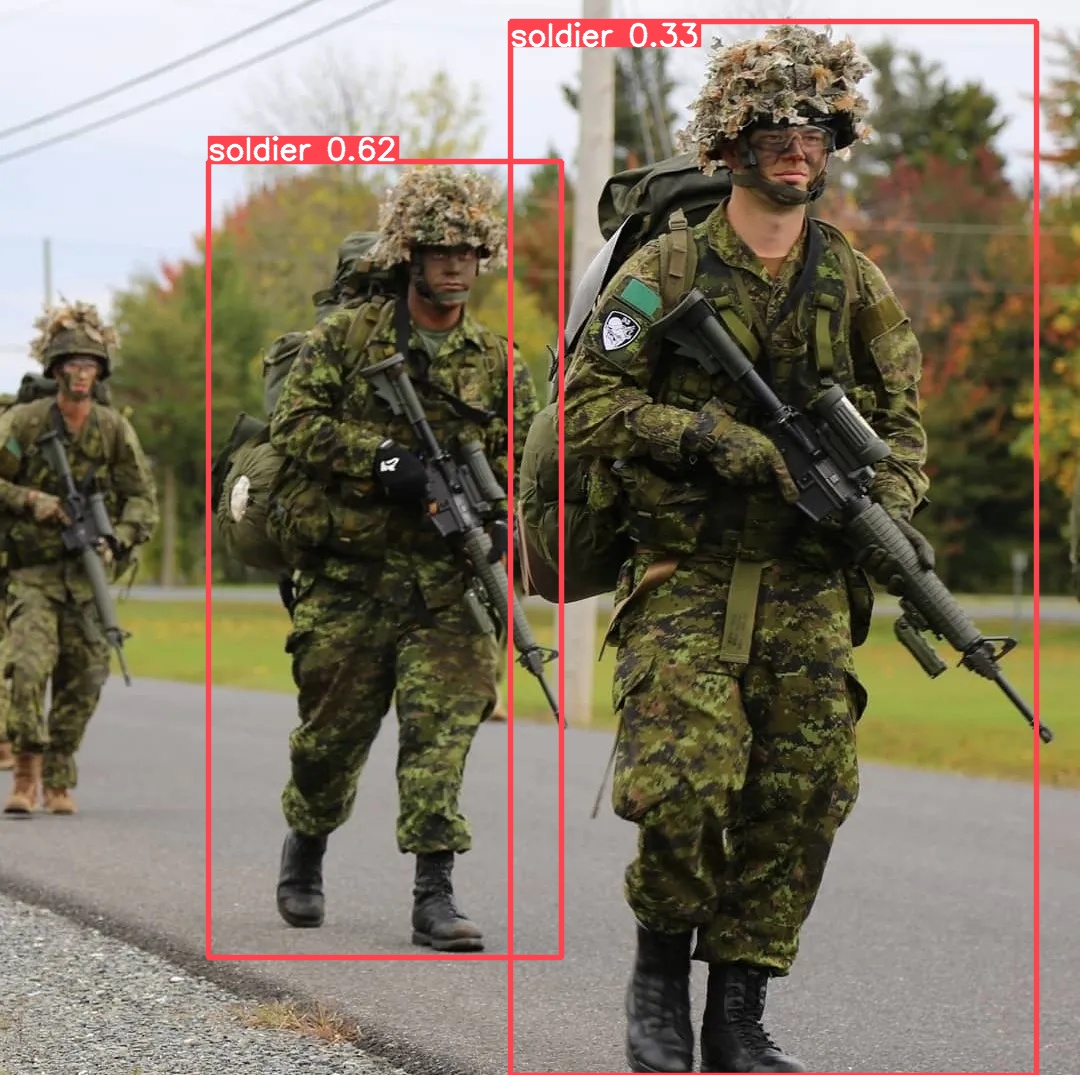
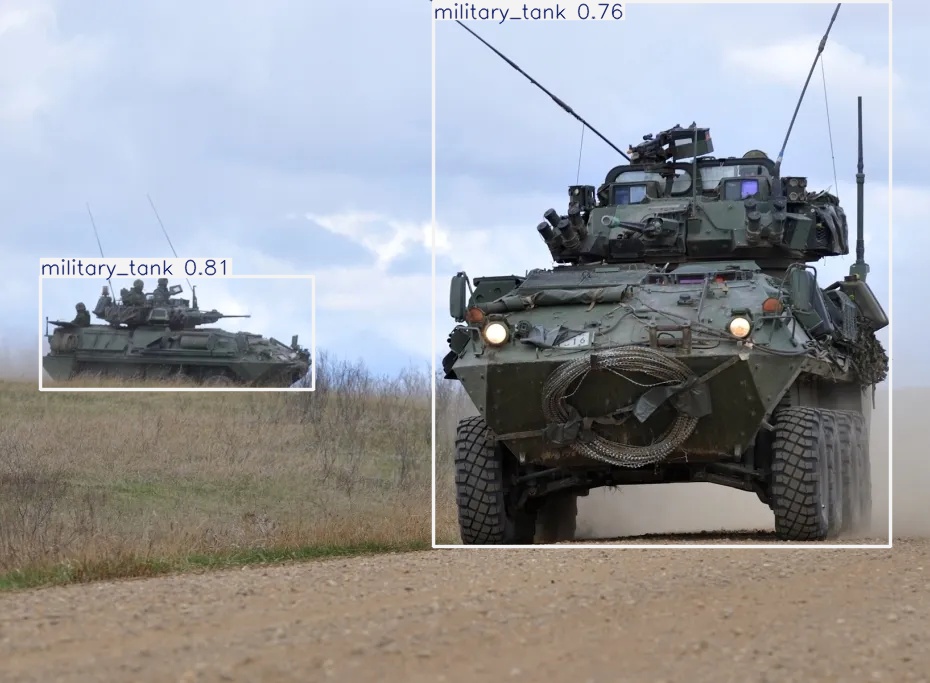
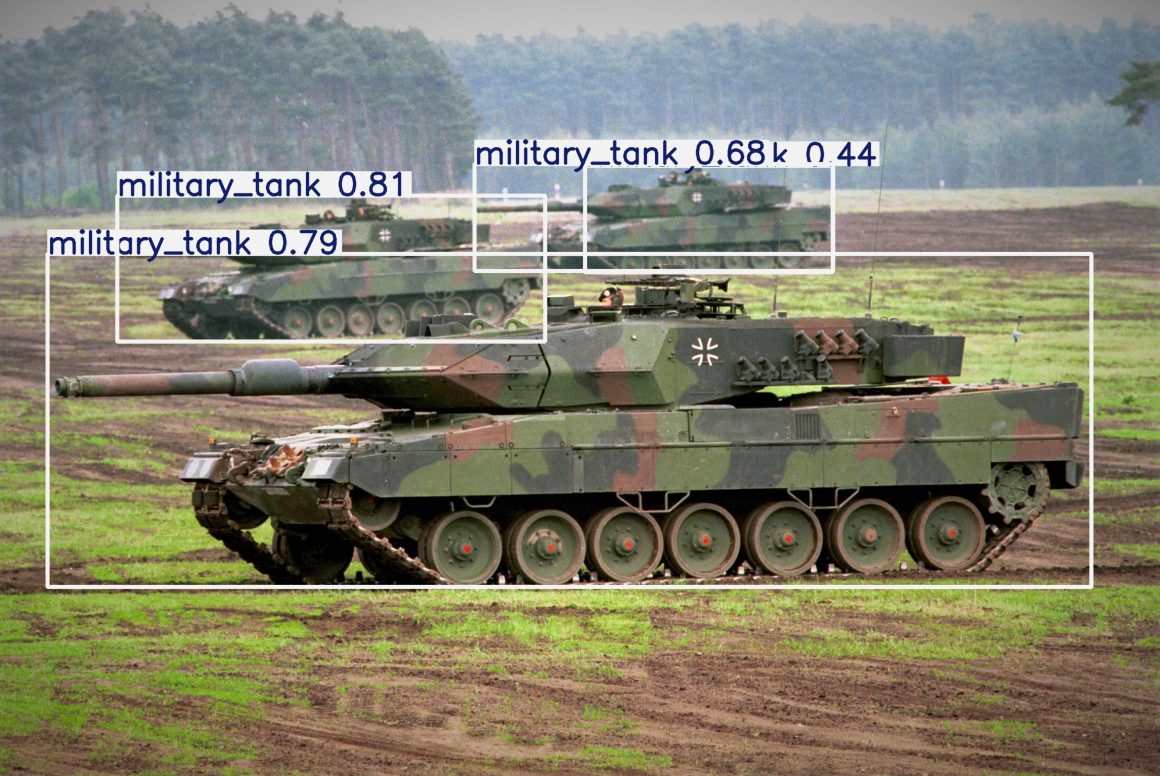
We will use the “Military Object Detection Dataset” from Kaggle. This dataset contains over 26,000 labeled images across 12 classes, including soldier, military_tank, military_aircraft, and more. It’s pre-formatted for YOLO, which saves us a lot of preparation time.
The kagglehub library makes it simple to download and cache the dataset within the Colab environment.
import kagglehub
import os

# Set a cache directory for Kaggle datasets
os.environ['KAGGLEHUB_CACHE'] = "/kaggle/input/"

# Download the latest version of the dataset
path = kagglehub.dataset_download("rawsi18/military-assets-dataset-12-classes-yolo8-format")

print("Path to dataset files:", path)
Expected Output:
Using Colab cache for faster access to the 'military-assets-dataset-12-classes-yolo8-format' dataset.
Path to dataset files: /kaggle/input/military-assets-dataset-12-classes-yolo8-format
Step 3: Train the Model
Now for the main event. We’ll use the ultralytics framework, which provides a wonderfully simple high-level API for training. We start with a pre-trained yolov12s.pt model (the ‘s’ denotes the “small” version) and fine-tune it on our military dataset.
data: Path to the dataset’s YAML file, which tells the trainer where the train/validation images are and defines the class names.epochs: We’ll train for 5 epochs. For a real-world application, you’d likely train for 50-100 epochs or more.imgsz: The image size to use for training. 640×640 is a common standard.batch: The number of images to process at once. This should be adjusted based on your GPU’s memory.
from ultralytics import YOLO

# Load a pre-trained YOLOv12 model
model = YOLO("yolov12s.pt")

# Train the model on our custom dataset
results = model.train(
    data='/kaggle/input/military-assets-dataset-12-classes-yolo8-format/military_object_dataset/military_dataset.yaml',
    epochs=5,
    imgsz=640,
    batch=4,
    save_dir='/content/yolo12_military/'
)
The training process will begin, showing progress for each epoch and reporting metrics like precision, recall, and mAP. Once finished, the best-performing model weights will be saved, typically as best.pt.
Step 4: Validate the Trained Model
Let’s quickly test our newly trained model on a few images from the test set to see how it performs.
from ultralytics import YOLO
from PIL import Image

# Load the best weights from our training run
# The exact path might change depending on the run number (e.g., train2, train3)
model = YOLO("/content/yolov12/runs/detect/train/weights/best.pt")

# A list of test images to validate on
image_paths = [
    "/kaggle/input/military-assets-dataset-12-classes-yolo8-format/military_object_dataset/test/images/000005.jpg",
    "/kaggle/input/military-assets-dataset-12-classes-yolo8-format/military_object_dataset/test/images/000008.jpg",
    "/kaggle/input/military-assets-dataset-12-classes-yolo8-format/military_object_dataset/test/images/006021.jpg",
    "/kaggle/input/military-assets-dataset-12-classes-yolo8-format/military_object_dataset/test/images/006022.jpg",
    "/kaggle/input/military-assets-dataset-12-classes-yolo8-format/military_object_dataset/test/images/008937.jpg",
    "/kaggle/input/military-assets-dataset-12-classes-yolo8-format/military_object_dataset/test/images/017081.jpg",
    "/kaggle/input/military-assets-dataset-12-classes-yolo8-format/military_object_dataset/test/images/003035.jpg"
]

# Run inference on each image and display the results
for img_path in image_paths:
    results = model(img_path)
    for r in results:
        r.show() # This will display the image with bounding boxes in your notebook
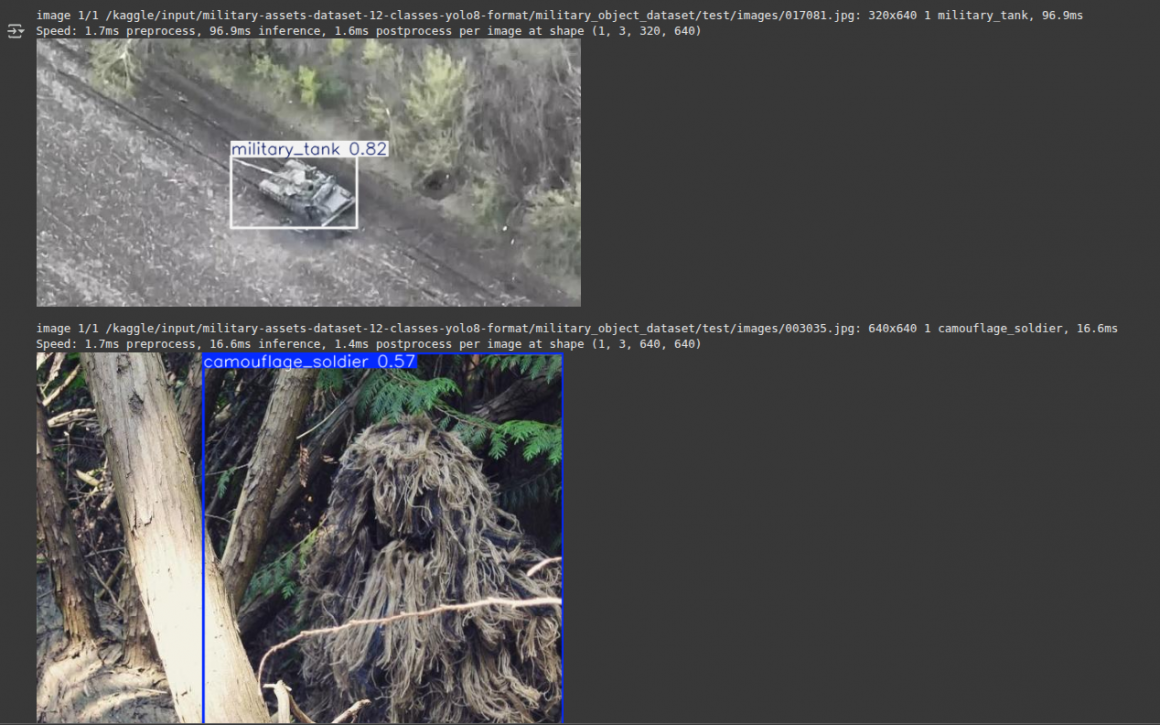
After running this, you will see the images with bounding boxes drawn around the detected military objects.
Now, download the best.pt file. This is the “brain” we will transfer to our drone.
Part 2: Deployment on NVIDIA Jetson Orin Nano
With our trained model in hand, it’s time to set up the Jetson Orin Nano and run drone object detection locally. This process is more involved than the Colab setup because we are dealing with specific hardware, drivers, and dependencies.
Step 1: System Preparation and CUDA Dependencies
First, update your system and install some basic tools. The libopenblas-dev package is a dependency for many scientific computing libraries.
sudo apt-get -y update
sudo apt-get install -y python3-pip libopenblas-dev
Next, we need to install cusparselt, a library required by some of the underlying components of our AI stack. You will need to find the correct version for your JetPack and CUDA installation from the NVIDIA developer website.
# Create a temporary directory
mkdir tmp_cusparselt && cd tmp_cusparselt

# Download the correct archive for your system (example for CUDA 12.x)
wget https://developer.download.nvidia.com/compute/cusparselt/redist/libcusparse_lt/linux-aarch64/libcusparse_lt-linux-aarch64-0.8.1.1_cuda12-archive.tar.xz

# Extract and copy the files to your CUDA installation
export CUSPARSELT_NAME=libcusparse_lt-linux-aarch64-0.8.1.1_cuda12-archive.tar.xz
tar xf ${CUSPARSELT_NAME}
sudo cp -a ${CUSPARSELT_NAME}/include/* /usr/local/cuda/include/
sudo cp -a ${CUSPARSELT_NAME}/lib/* /usr/local/cuda/lib64/

# Clean up and update the library cache
cd ..
rm -rf tmp_cusparselt
sudo ldconfig
Step 2: Install PyTorch
You cannot install PyTorch with a simple pip install torch on a Jetson. You need a specific build compiled for the Jetson’s ARM architecture and GPU. NVIDIA provides these pre-built wheels.
- Visit the PyTorch for Jetson forum thread to find the correct wheel for your JetPack version.
- Download the
.whlfile to your Jetson. - Install it using pip. We also ensure
numpyis a compatible version.
# Make sure pip is up to date
python3 -m pip install --upgrade pip

# Install a compatible numpy version before installing torch
python3 -m pip install numpy==1.26.1

# Install the downloaded PyTorch wheel (update the path to your file)
export TORCH_INSTALL=~/Downloads/torch-2.5.0a0+872d972e41.nv24.08.17622132-cp310-cp310-linux_aarch64.whl
python3 -m pip install --no-cache $TORCH_INSTALL
Verify the installation:
python3 -c "import torch; print(f'PyTorch installed: {torch.__version__}'); print(f'CUDA available: {torch.cuda.is_available()}')"
Step 3: Install TorchVision
Similarly, TorchVision must be built from source against the version of PyTorch you just installed.
# Install build dependencies
sudo apt-get install libjpeg-dev zlib1g-dev libpython3-dev libopenblas-dev libavcodec-dev libavformat-dev libswscale-dev

# Clone the correct branch of the torchvision repository
# (e.g., v0.18.0 for PyTorch 2.4.0 - check the compatibility table on the forum)
git clone --branch v0.20.0 https://github.com/pytorch/vision torchvision
cd torchvision

# Build and install
export BUILD_VERSION=0.20.0
python3 setup.py install --user
cd ..
Step 4: Install YOLOv12 and Dependencies
Now we install YOLOv12, but we must be careful not to reinstall the libraries we just manually set up.
# Clone the repository
git clone https://github.com/sunsmarterjie/yolov12
cd yolov12

# IMPORTANT: Edit requirements.txt
# Open the file and comment out (add a '#' at the beginning of the line) for:
# - torch
# - torchvision
# - numpy
# - opencv-python (we'll use the one provided by JetPack)
# - onnxruntime-gpu (we will install this separately)
# - flash_attn

# Now, install the remaining requirements
pip install -r requirements.txt

# Install a few more packages needed for the framework
pip install thop seaborn
pip install labelme --no-dependencies

# Finally, install the yolov12 package itself without its dependencies
pip install -e . --no-dependencies
Step 5: Install ONNX Runtime for GPU
For the best performance, we need to install a version of ONNX Runtime that is specifically built to leverage the Jetson’s GPU.
- Go to the Jetson AI Lab PyPI and find the
onnxruntime_gpuwheel for your JetPack and CUDA version. - Download the wheel.
- Install it.
# Uninstall any existing onnxruntime
pip uninstall onnxruntime

# Install the GPU-enabled version (update the filename)
pip install ~/Downloads/onnxruntime_gpu-1.23.0-cp310-cp310-linux_aarch64.whl
Verify the installation:
python3 -c "import onnxruntime; print(onnxruntime.get_available_providers())"
Your Jetson Orin Nano is now a fully configured edge AI device, ready for inference.
Part 3: Running Inference on the Jetson
Place your trained best.pt model file in the main directory. Create a folder named testing with subfolders images and results. Place some test images in testing/images.
Drone Object Detection on Static Images
This script loads our model, iterates through a list of image files, runs drone object detection on each, and saves the annotated image to the results folder.
from ultralytics import YOLO
import os

# --- Configuration ---
MODEL_PATH = "best.pt"
IMAGE_SOURCE_DIR = "testing/images"
RESULTS_SAVE_DIR = "testing/results"

# List of images to process
image_filenames = [
    "soldier.jpg",
    "soldiers.jpg",
    "vehicle.jpg",
    "tanks.jpg",
    "helicopter.jpeg",
]

# --- Main Execution ---

# Ensure the results directory exists
os.makedirs(RESULTS_SAVE_DIR, exist_ok=True)

# Load the fine-tuned YOLOv12 model
print(f"Loading model from {MODEL_PATH}...")
model = YOLO(MODEL_PATH)
print("Model loaded successfully.")

# Process each image
for filename in image_filenames:
    img_path = os.path.join(IMAGE_SOURCE_DIR, filename)
    print(f"\nProcessing image: {img_path}")

    if not os.path.exists(img_path):
        print(f"Warning: Image not found at {img_path}. Skipping.")
        continue

    # Run inference
    results = model(img_path)

    # The result object contains all detection data.
    # We can display it to the screen or save it.
    for result in results:
        # Display the image in a window (requires a display connected)
        result.show()

        # Save the annotated image to a file
        save_path = os.path.join(RESULTS_SAVE_DIR, f"{filename}_result.jpg")
        result.save(filename=save_path)
        print(f"Result saved to: {save_path}")

print("\nInference complete.")
The code should save images with annotations to the results folder:
Real-Time Inference from a Camera Feed
This is where the power of edge AI in drone object detection becomes truly apparent. The following script captures frames from a connected USB camera, runs our YOLOv12 model on each frame in real-time, and displays the output.
from ultralytics import YOLO
import cv2

# --- Configuration ---
MODEL_PATH = "best.pt"
CAMERA_INDEX = 0 # 0 is typically the default camera
RESIZE_FACTOR = 0.5 # Resize frame to speed up inference

# --- Main Execution ---

# Load the fine-tuned model
model = YOLO(MODEL_PATH)

# Initialize video capture
cap = cv2.VideoCapture(CAMERA_INDEX)
if not cap.isOpened():
    print(f"Error: Could not open camera at index {CAMERA_INDEX}")
    exit()

print("Starting camera feed... Press 'q' to exit.")

while True:
    # Capture frame-by-frame
    ret, frame = cap.read()
    if not ret:
        print("Error: Failed to capture frame.")
        break

    # Resize the frame for faster processing
    if RESIZE_FACTOR != 1.0:
        resized_frame = cv2.resize(frame, None, fx=RESIZE_FACTOR, fy=RESIZE_FACTOR)
    else:
        resized_frame = frame

    # Run YOLOv12 inference on the frame
    results = model(resized_frame, verbose=False) # verbose=False for cleaner output

    # The results object contains detections. The .plot() method
    # conveniently draws all bounding boxes and labels on the frame.
    annotated_frame = results[0].plot()

    # Display the resulting frame
    cv2.imshow("YOLOv12 Real-Time Detection", annotated_frame)

    # Break the loop if 'q' is pressed
    if cv2.waitKey(1) & 0xFF == ord('q'):
        break

# When everything done, release the capture and destroy windows
cap.release()
cv2.destroyAllWindows()
print("Camera feed stopped.")
Running this script will open a window showing your camera’s view, with your trained model actively identifying and boxing objects in real-time. This is the foundational perception system for our autonomous drone.
Summary and Next Steps
In this article, we took the critical first step in our project. We established the core architecture of our drone’s brain, separating high-level logic from low-level flight control. We explored why edge computing on a device like the NVIDIA Jetson Orin Nano is essential for this task.
Most importantly, we went through the complete, end-to-end engineering workflow for creating a custom drone object detection:
- We selected YOLOv12 and understood what makes it effective.
- We fine-tuned the model on a custom dataset in a cloud environment.
- We’ve prepared our edge device, the Jetson Orin Nano, installing a specific and optimized software stack.
- We successfully deployed our trained model, running inference on both static images and a live camera feed.
This drone object detection capability is a simple concept, but it is the sensory input upon which all of the drone’s future autonomous behavior will be built. Without the ability to perceive, a machine cannot intelligently act.
In the next article in this series, we will take this perception system and integrate it with the drone’s vitality system. We will explore how to translate detection data into actionable flight commands, moving us one step closer to a truly autonomous agent. Stay tuned.
Frequently Asked Questions
Why use the NVIDIA Jetson Orin Nano for a drone?
The NVIDIA Jetson Orin Nano is a compact, power-efficient computer designed for running modern AI workloads at the edge. Its powerful GPU with Tensor Cores allows for real-time AI inference directly on the drone, which is critical for low-latency decision-making without relying on a cloud connection.
What makes YOLOv12 a good choice for drone object detection on the edge?
YOLOv12 is optimized for a strong balance of speed and accuracy. Its “Area Attention” mechanism and efficient R-ELAN architecture provide high accuracy while maintaining the low computational cost needed for real-time performance on resource-constrained devices like the Jetson.
Do I need a Jetson device to train the YOLO model?
No. The training process, which is computationally intensive, is best performed on a powerful GPU in a cloud environment like Google Colab. After the model is trained, the resulting weight file (e.g., best.pt) is a small file that can be transferred to the Jetson device for deployment and real-time inference.
What is “edge computing” in robotics?
In robotics, edge computing refers to processing data and running AI models directly on the robot (or drone) itself, rather than sending data to a remote server. This is essential for autonomous systems that require immediate responses to their environment and must function in areas without reliable internet access.